
 Image 1 of 1
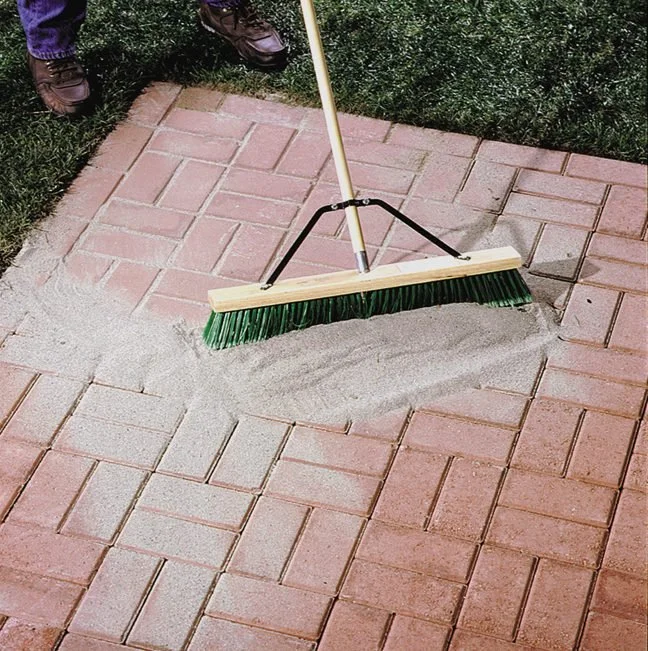
Re-sanding is a vital step in the paver restoration process that helps restore the structural integrity and aesthetic appeal of your paved surfaces. Here's how it works:
Importance of Joint Sand:
Pavers are laid with joints between them, which are filled with sand. This joint sand helps lock the pavers together, preventing shifting and settling while also providing drainage. Over time, this sand can erode due to weather, foot traffic, or power washing, leading to uneven surfaces and potential weed growth.
Assessment of Joint Condition:
Before re-sanding, we assess the condition of the existing joint sand. If it has been washed away, compacted, or contaminated by weeds or debris, it’s essential to replace it for optimal performance.
Cleaning the Joints:
After power washing the pavers, we ensure that the joints are clean and free from any debris, old sand, or residues. This is crucial for allowing the new sand to properly fill the joints and create a secure bond.
Applying New Joint Sand:
We use high-quality, polymeric joint sand specifically designed for paver installations. This sand has enhanced properties that help prevent weed growth and resist erosion.
The sand is spread evenly across the paver surface, ensuring it reaches all the joints. We use a broom to sweep the sand into the joints effectively.
Compacting the Sand:
After filling the joints, we may lightly compact the pavers to settle the sand into place. This step involves using a compaction plate or a rubber mallet to ensure the sand is snugly fitted within the joints, enhancing stability.
Final Sweeping and Residue Removal:
Once the sand is compacted, we perform a final sweeping to remove any excess sand from the surface of the pavers. This helps achieve a clean and polished look while preventing sand from interfering with the sealing process.
Moistening the Sand (if using polymeric sand):
If using polymeric sand, it may be necessary to lightly mist the surface with water after installation to activate the binders in the sand. This process helps create a solid bond within the joints, enhancing durability.